Deploying a Tribes Server on Railway
Starting your first Tribes server is very easy to do. There is already an integration with the Railway platform. This is a cloud hosting company started during the pandemic that has a very good reputation for easy of use and friendliness.
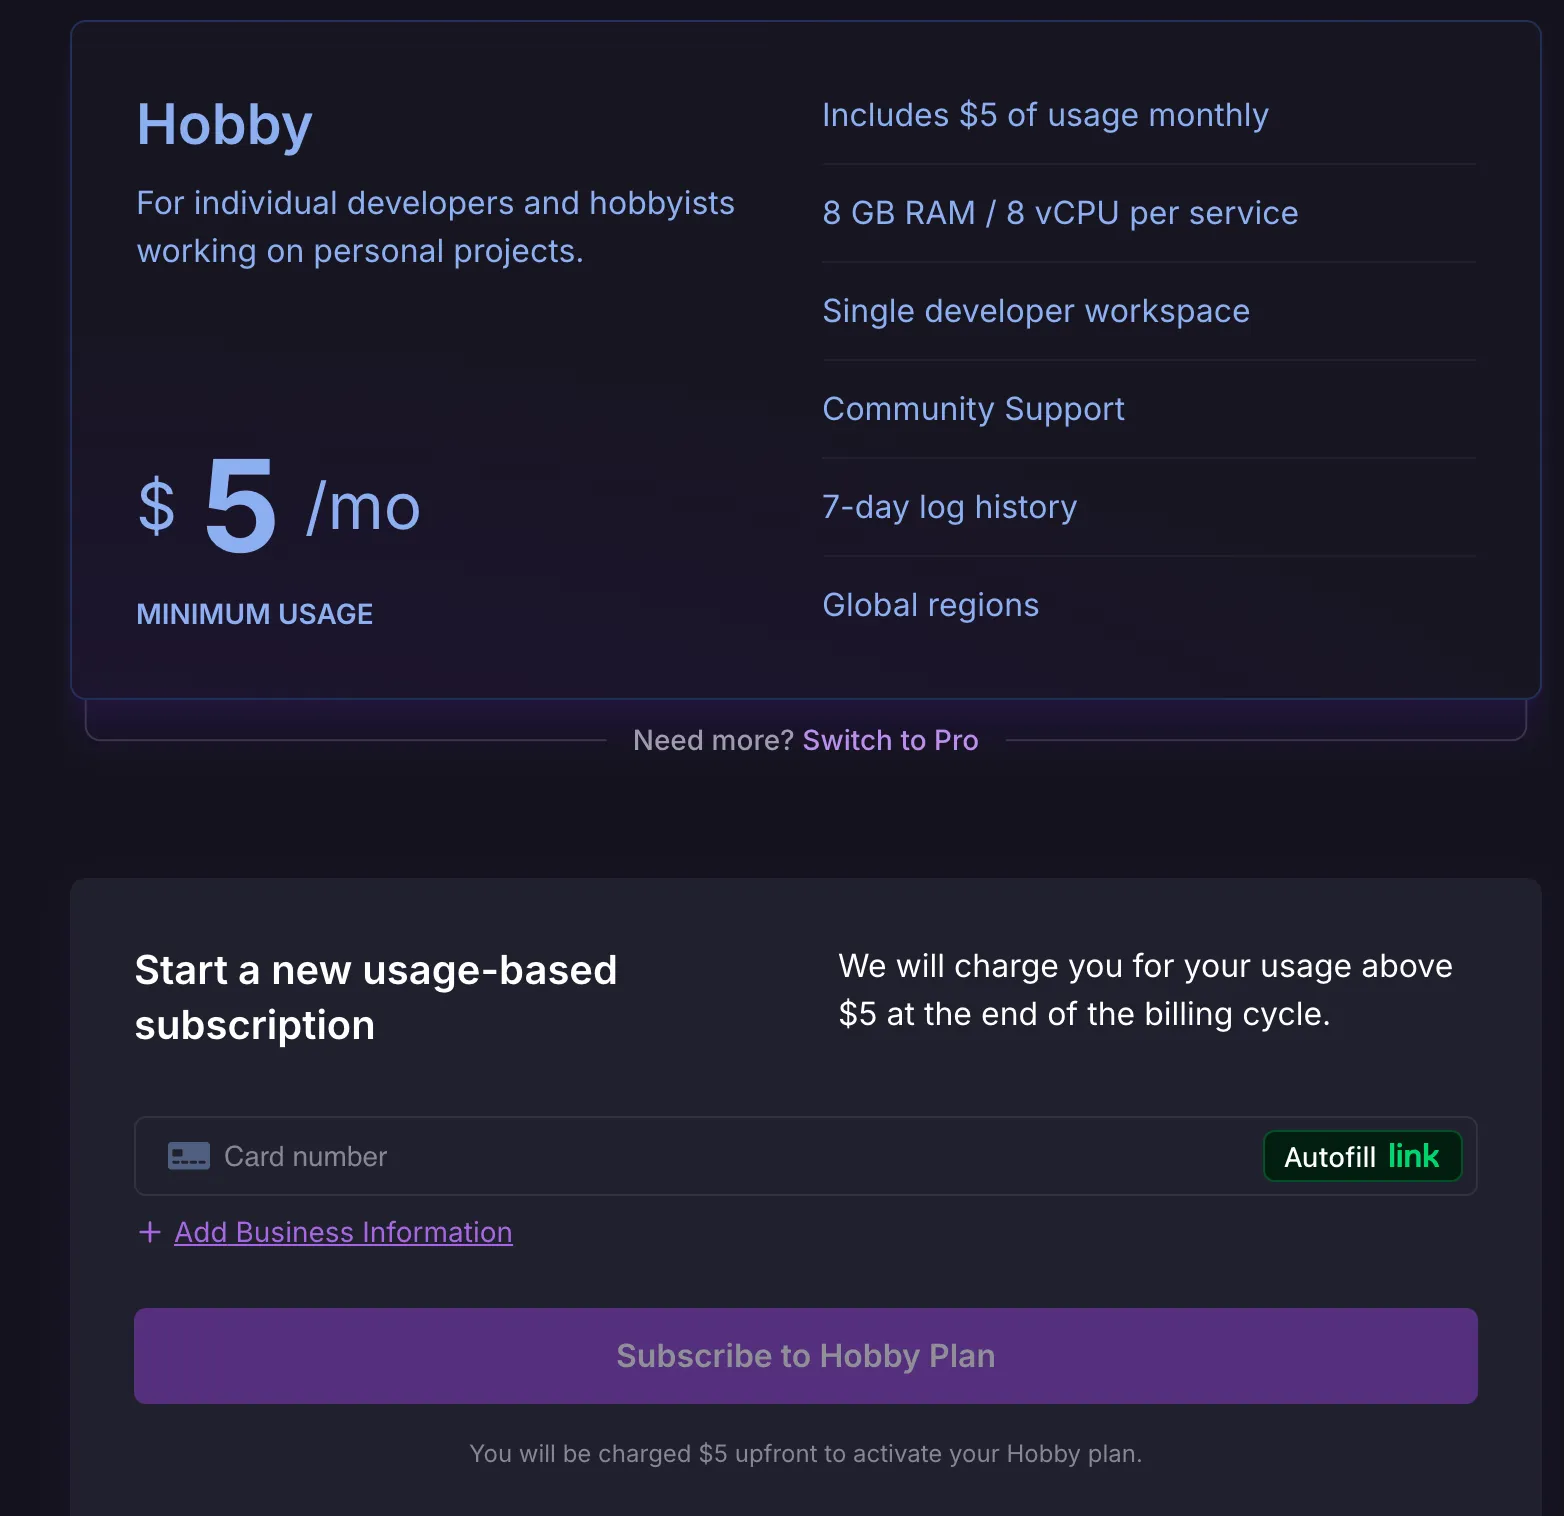
You can create an account on Railway.app. After you have created this account, click on the following button to create an instance of a Tribes server on your account. To be able to deploy you will need to upgrade your account to the “Hobby” level. This means that you will only get charged for what you use. For a small Tribes server, this will only amount to a couple of dollars a month.

Getting your public key
Section titled “Getting your public key”
You will need to get your public key from the Tribes client. If you haven’t already done so, download the Tribes client, do so now.
The public key for your Tribes client is how you will be able to login to the admin panel. From there you can send messages to members of your servers or block people from viewing content on the server.
Getting your admin password
Section titled “Getting your admin password”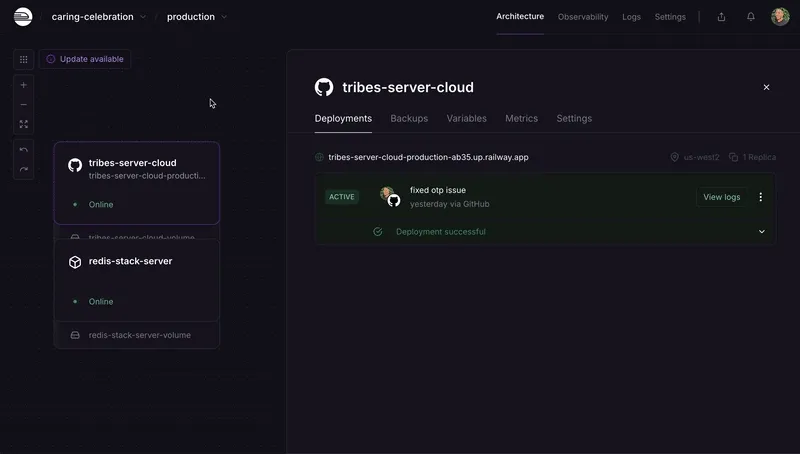
The very first time you run a Tribes server, you will be given a one-time password. After you have entered your public key, the password will be deleted and no longer used for logins.
You can find your one-time password by clicking on the “View logs” button. The username will always be “admin”.
After you have gone through the setup wizard, you will be redirected to your.domain.com/supmod. This is the admin login page and this is where you will enter your public key again to authenticate.
Authenticating as an admin
Section titled “Authenticating as an admin”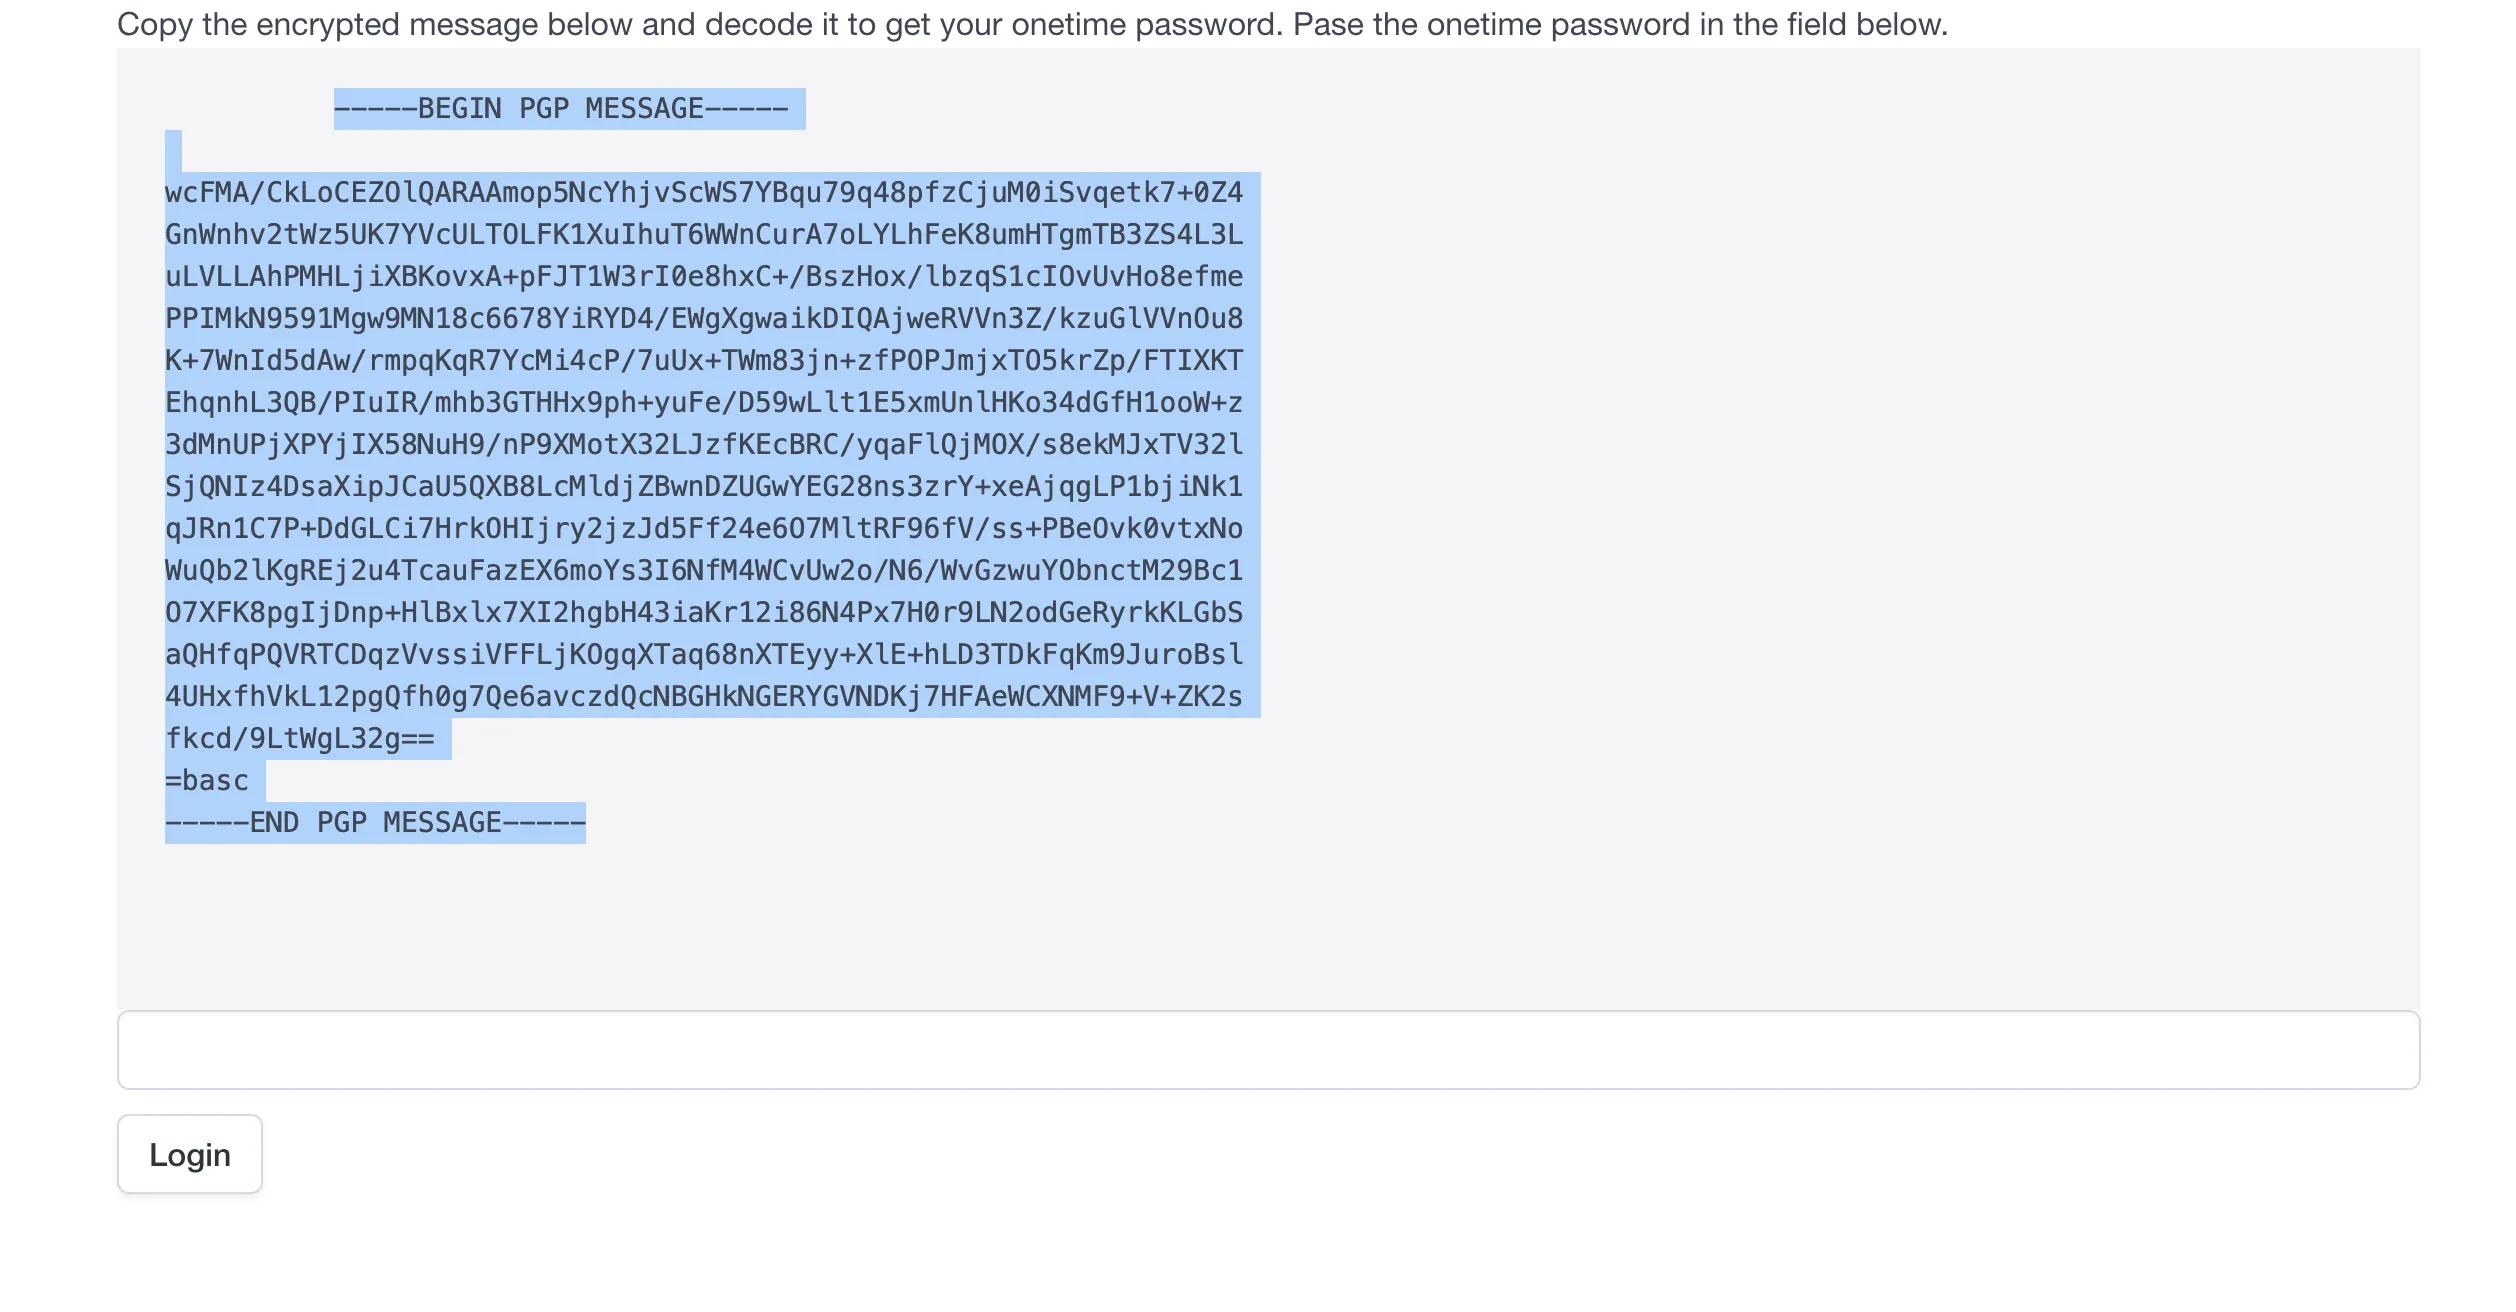
After you enter your public key, the webpage will display a very long wall of text that begins with ”--- PGP MESSAGE ---”. Copy this text into the “Encode/decode message” section of the Tribes client. The message will be decoded and you must follow the directions to correctly log in.
Behind the scenes, what happened is that the server created a message encrypted by your public key. Your private key IS THE ONLY WAY to decrypt this message. You entering in the correct value is confirming that the correct person decrypted the message. This is why it is VERY IMPORTANT to keep your private key very safe. If someone were to get a hold of it, they could impersonate you throughout the Tribes network.
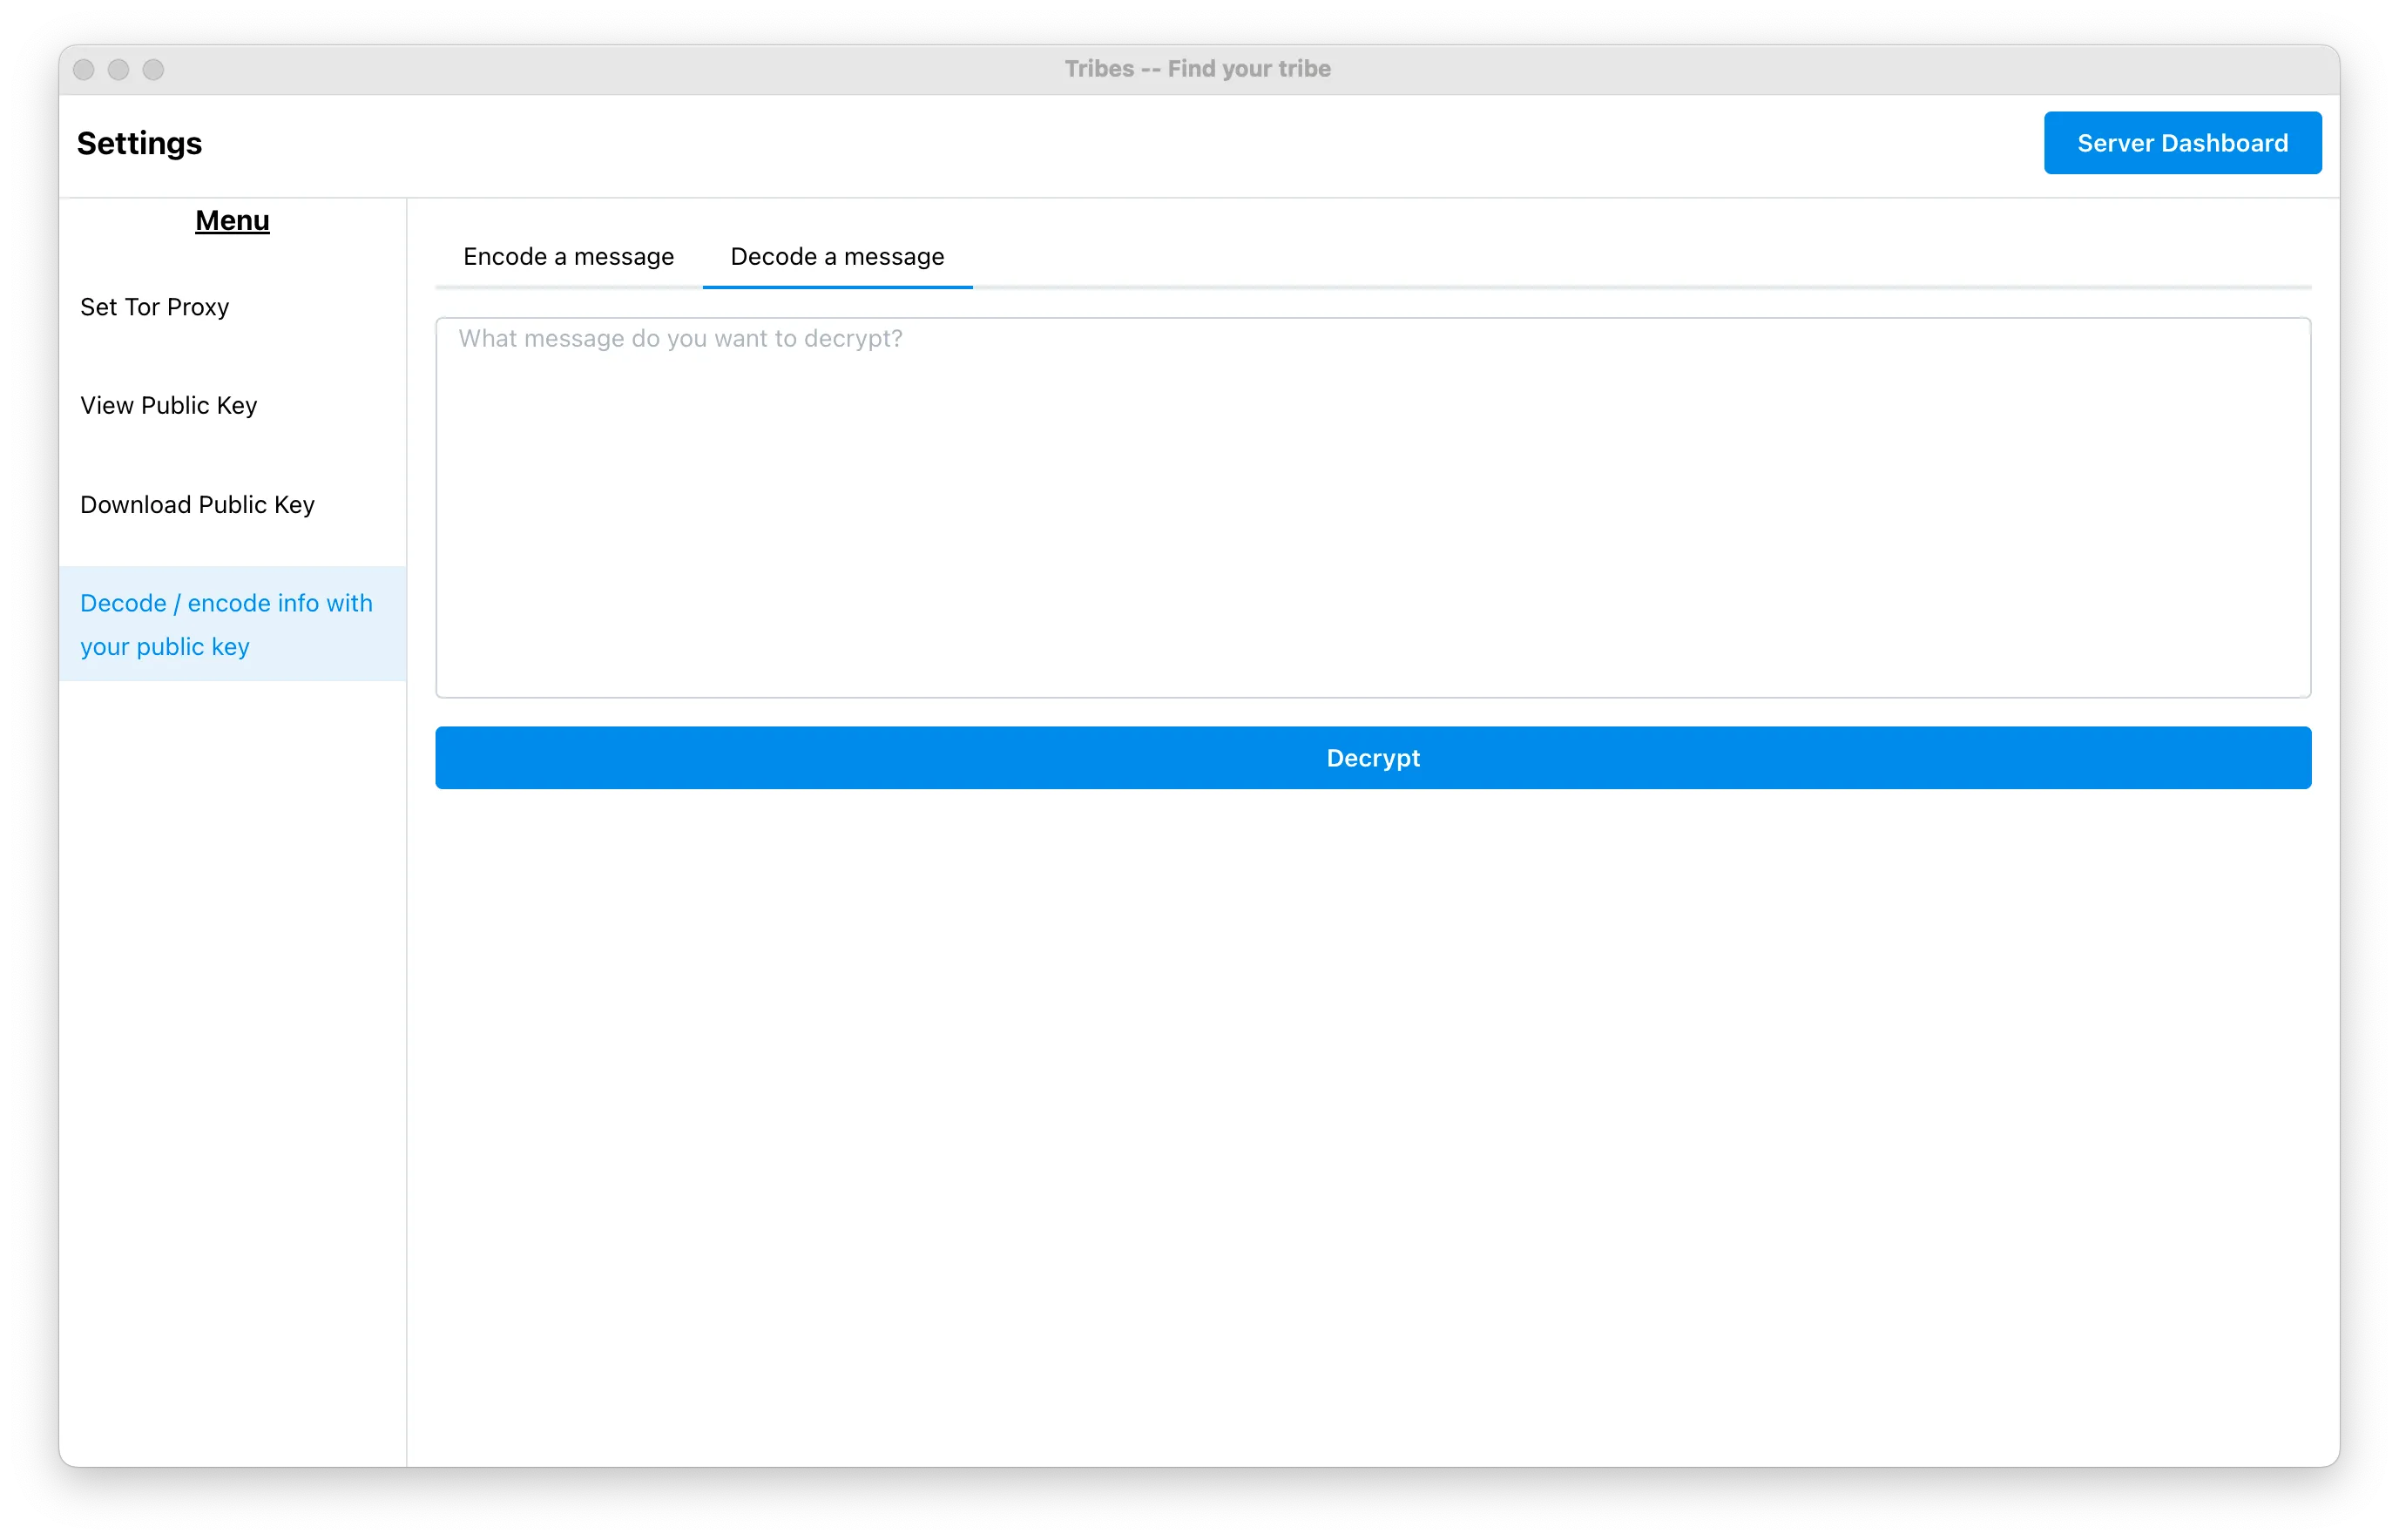
You can decode this message on the Tribes client by going to the same section where you found your public key. There will be an option on the left-hand side called “Encode/decode info with your public key”. Paste the message in the text area and click “Decrypt”. After you see the challege message, paste that into the Tribes server. Viola! Now, you’re logged in!
From the admin panel you can add members to your server. By default, Tribes servers are set to public. This means that anyone can post topics to your server, but they are not allowed in the server chat. From the admin panel, you can also block people that cause trouble on your server. You will need their public key to do this. Lastly, you can change up your welcome message. This is the first thing that people see when they visit your server. It is a good place to write up the rules of the server.
Sharing your server address
Section titled “Sharing your server address”Now, that you have your server. You can share it with others! If you have a private server, the people that connect to it will need to have the Tribes client to be able to connect obviously. If you want to broadcast your server to others Tribes in the network, you can do so on the Find Your Tribe subreddit.